
Zipify OneClickUpsell Hands-On Review (2020)
One of the smartest ways to increase sales is by selling to people who are already purchasing from you. With Zipify OneClickUpsell, you can get more post-purchase upsells as customers complete their order.
Zipify OneClickUpsell provides you with a powerful tool which puts relevant products in front of more, willing-to-buy, customers. As a bonus, you can also create post-purchase emails to get more sales, product reviews, and engagement with your customers.
If you’ve been looking for a sales strategy to improve your Shopify store, perhaps Zipify OneClickUpsell is the way to do it.
Benefits of Zipify OneClickUpsell
Upselling is a sales strategy that allows you to introduce more products to a customer, such as upgrades, add-ons, accessories, and more. If there are products in your store that pair well together, having the ability to upsell or cross-sell can quickly improve your store’s performance.
One of the highlighting features of Zipify OneClickUpsell is that you won’t have to worry about losing a customer if they don’t want your upsell. Your upsell offers are only visible after a customer has made their purchase for an item on your store.
Zipify has developed a sophisticated Shopify app that makes upsells and downsells visible in a sequential order. This means, after your customer checks out and completes their payment, they will then be shown your upsell. If they reject the upsell, a downsell will then be offered.
Here’s an example:
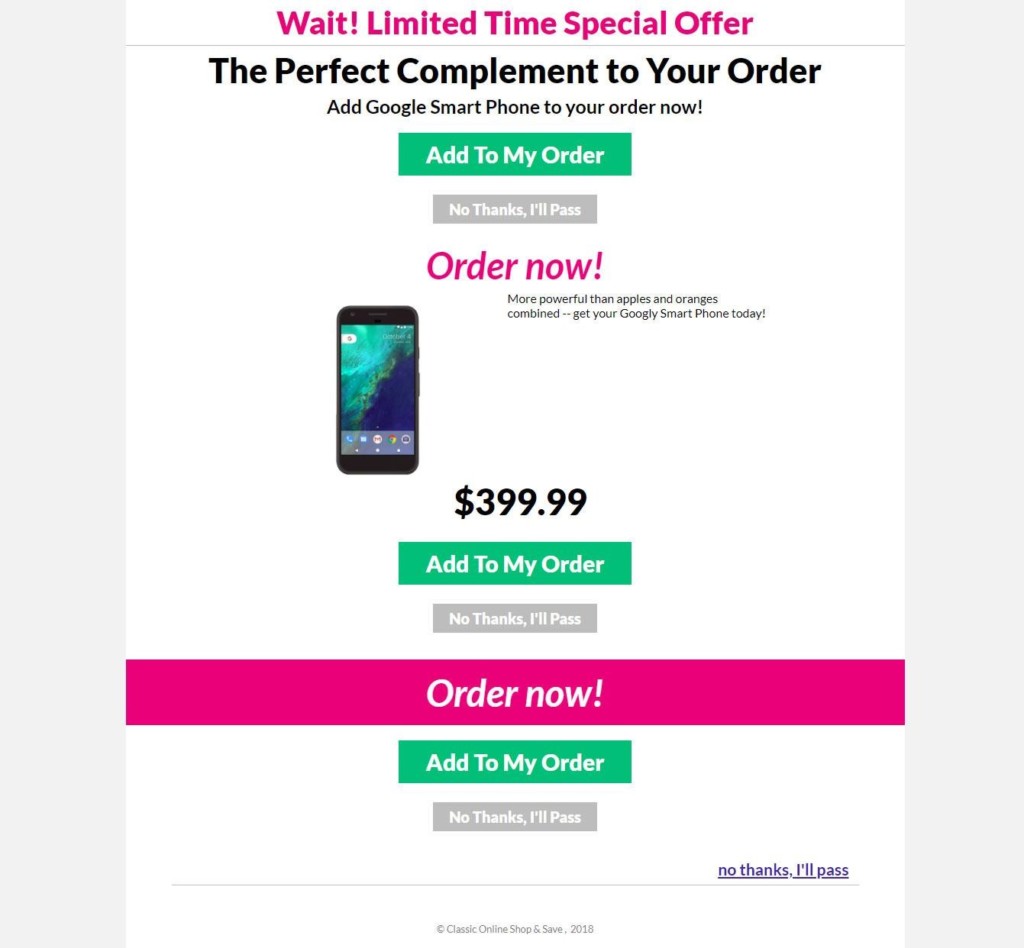
If you’re selling smartphones on your Shopify store, you can create an upsell for a high quality power bank. If your customer rejects this, you can display a phone case at a lower price point they might be interested in.
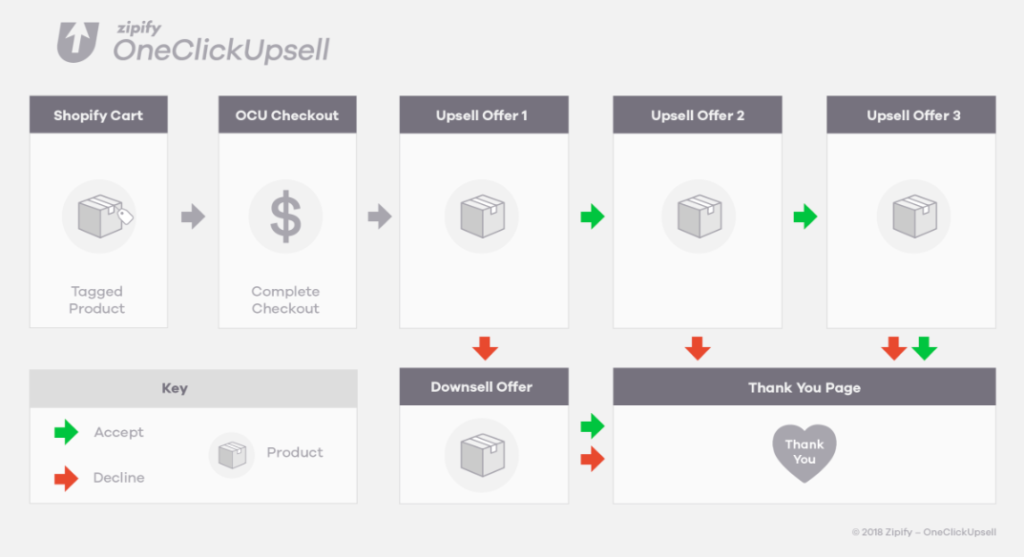
You have full control over how many and what kind of upsells and downsells you want to offer to your customers. By developing a smart strategy, you can quickly improve your store profits.
But first, you’re going to need a Shopify store to achieve that.
Shopify 14-Day Free Trial
To use Zipify OneClickUpsell, you must have a Shopify store. For anyone reading this review without one, you can create an ecommerce store, right now, for free.
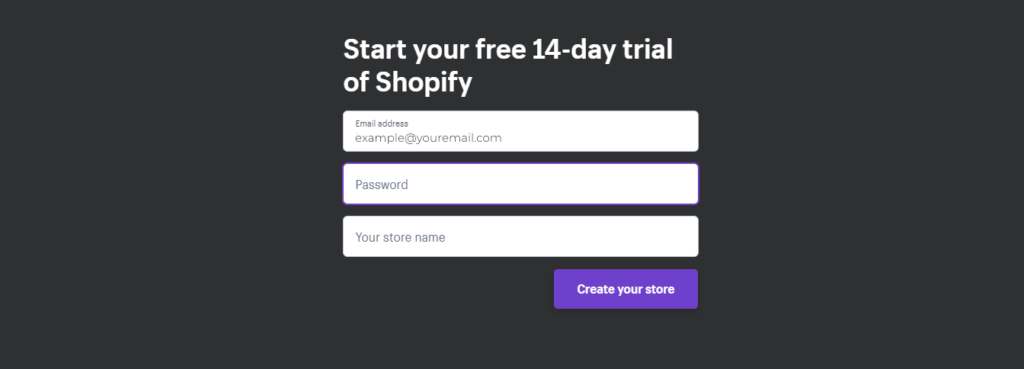
When you go to Shopify.com, all you need is an email to start a 14-day free trial. Best of all, you don’t need a credit card for this.

After you have entered your email and clicked “Get started” you’ll be asked for your store name and a password.
The next step is to check your email for a confirmation message to activate your account.
Getting started on Shopify is quick and easy. Then, with your account activated you are ready to start building your ecommerce store and installing Zipify OneClickUpsell.
Getting Started With Zipify OneClickUpsell
After setting up your free Shopify trial account or logging into your store, let’s look at how to install Zipify OneClickUpsell.
Unlike other apps found in the for Shopify App Store, you will not find Zipify OneClickUpsell.
Instead, you must go to Zipify’s website, and click ORDER NOW or scroll down to the pricing options.


You have the option to pay for a monthly ($47 per month) or yearly ($397 per year) subscription. Once you have decided which plan is best for your business, you’ll be sent to an order form.
To access Zipify OneClickUpsell, you are required to submit your credit card information:

Your credit card will be charged after you click “Complete my purchase”, however, Zipify backs every purchase with a 30-day Money Back Guarantee:

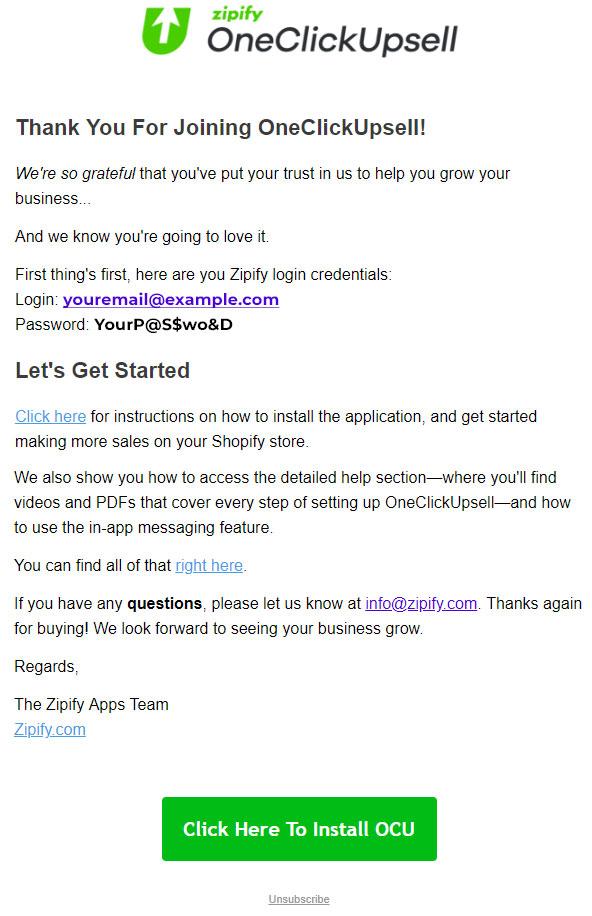
After making your payment, a confirmation email is sent providing you with more information about installing Zipify OneClickUpsell on your Shopify store.
Installing Zipify OneClickUpsell
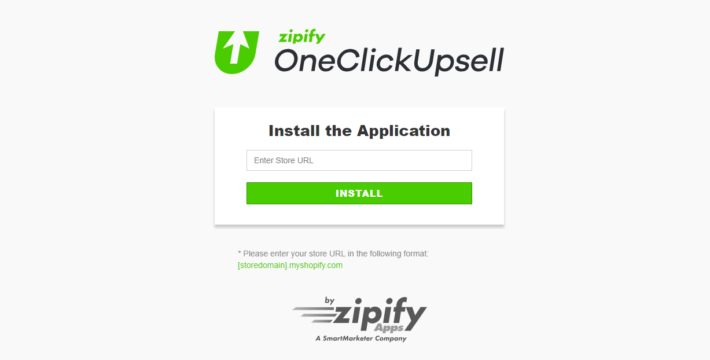
To install Zipify OneClickUpsell on your Shopify store, go to your confirmation email and click on the prominent “Click Here To Install OCU” button.
Next, you’ll navigate to a page requesting your Shopify store name. Be sure to submit the full URL to your Shopify store (i.e. your-shopify-store-name.myshopify.com).

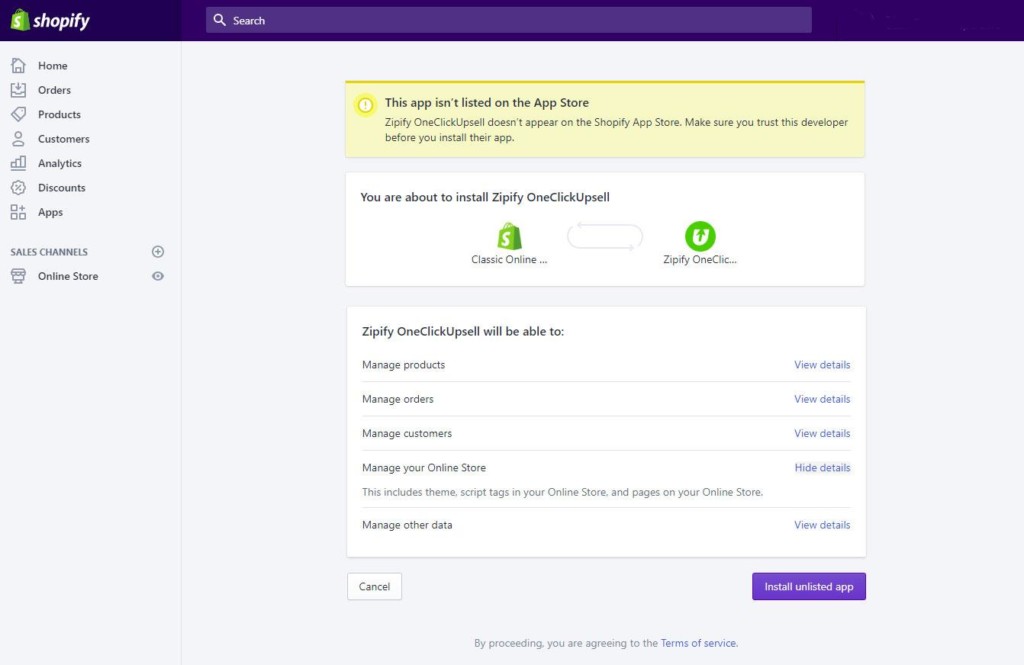
If you’re already logged into your Shopify store, Zipify OneClickUpsell will appear in your dashboard.
Click “Install Unlisted App” to begin installation:
It will take a few minutes for Zipify OneClickUpsell to install into your Shopify account:

When the installation process is complete, you’ll be prompted to submit your email and password (refer to your confirmation email for these):

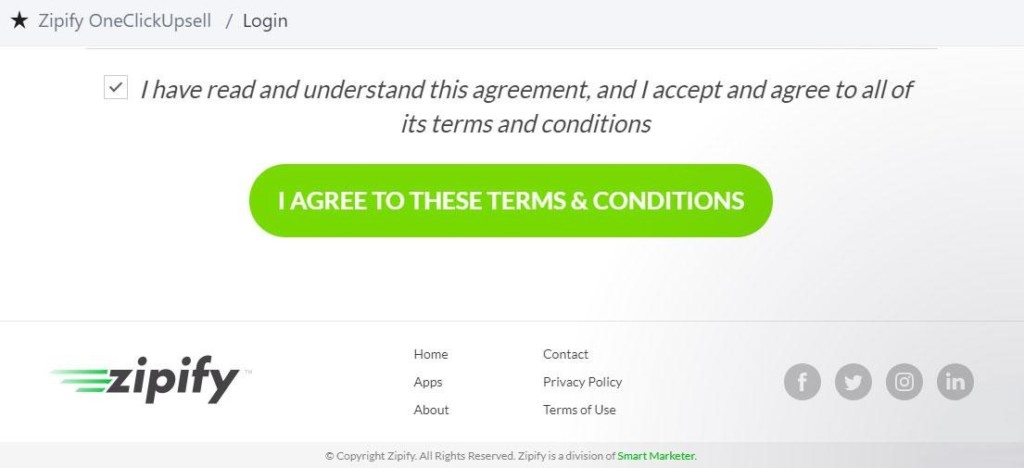
The final step to install Zipify OneClickUpsell is to accept their terms and conditions:
Creating Upsells
Now that you have successfully installed Zipify OneClickUpsell on your store, you should see something like this in your dashboard:
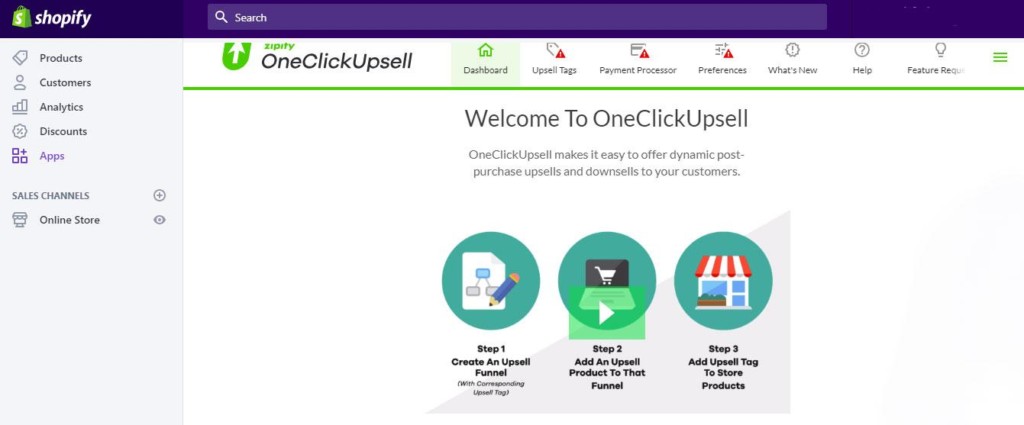
To start creating upsells, You’ll need some Upsell Tags. In your dashboard, go to Upsell Tags >> ADD NEW TAG:

Before continuing with the setup of Zipify OneClickUpsell, you’ll want to take a moment to figure out your upsells, downsells, and overall strategy.
Creating An Upsell Strategy
To make the most out of Zipify OneClickUpsell, you’ll want to figure out which products to present to your customers.
Ask yourself these questions:
- What are your best-selling small items?
- Which items in your store do people typically buy together?
- Are there any items that would pair well after their initial purchase?
- What do you want the customer journey to be like?
- How could you maximize your profits?
- What downsells would pair will with a rejected downsell?
Your upsell strategy should be adaptable and meet the needs of your customers. Adjusting your upsells month by month would be the best way to see what works best.
Setting Up An Upsell Funnel
Once you have a strategy in mind and your products sorted into appropriate upsells and downsells, it’s time to set them up.
Go back to the Upsell Tags and start adding labels. After adding a few, you can begin to link specific products to that tag category.
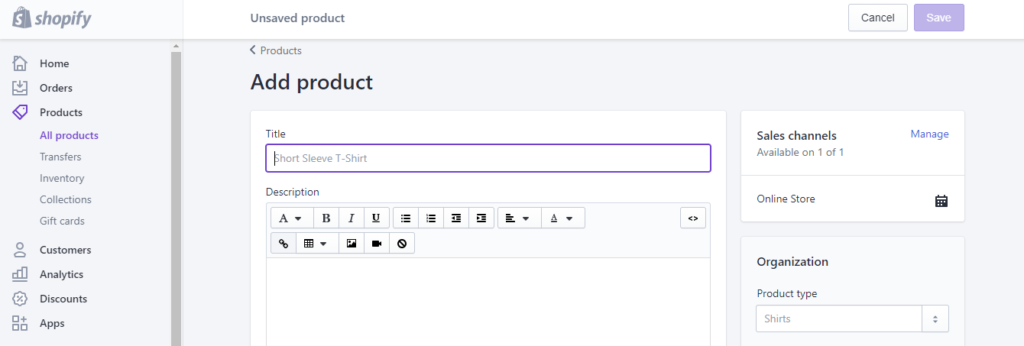
If you’ve started a new store, you’ll have to add a few products first.
Once you have uploaded your products and created all your tags, you can start to add upsells, downsells, and trigger products.
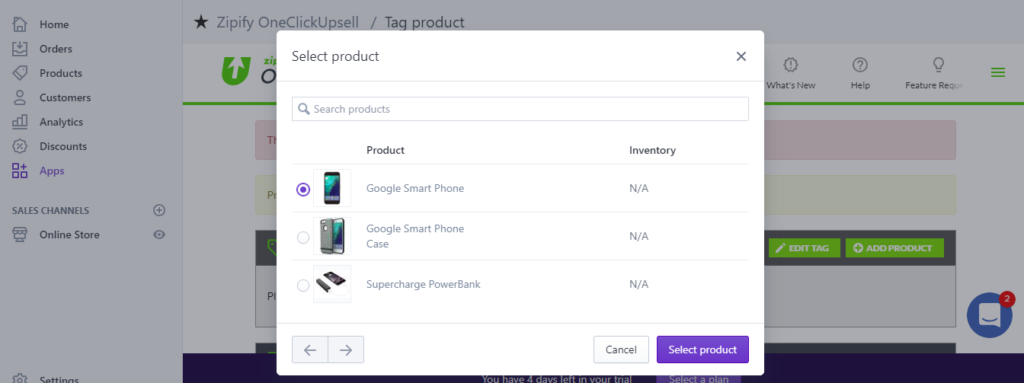
Go to Upsell Tags and click on the pencil icon to edit your tags. Next, click on Add Products:

A pop-up will appear and you’ll be able to choose which product this Upsell Tag is for:
You’ll be directed to a new page with the product you selected. Here you can set up whether it is an upsell or a downsell as well as other details that will appear on your store.

- Product Title allows you to create a new and unique title.
- Active / Inactive allows you to turn on and off upsells depending on the season or your sales strategy.
- Type of Offer allows you to decide whether this product is an upsell or downsell.
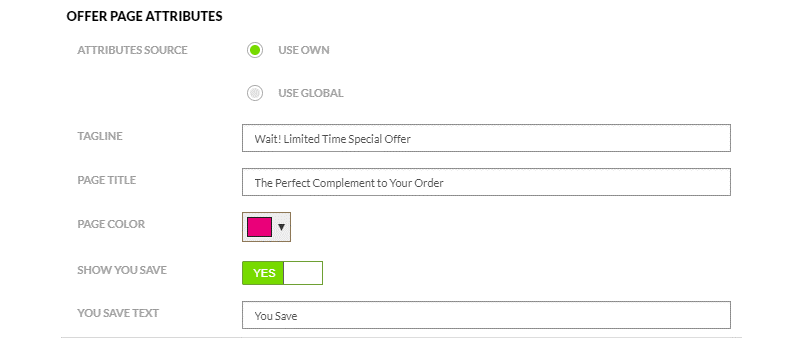
- Offer Page Attribute allows you to use the native settings in your store (Global) or create custom setting (Use Own):
- Purchase Button allows you to create a custom and unique purchase button for your upsell/downsell.
- Decline Button allows you to create a custom and unique decline button for your upsell/downsell.
- Offer Decline Link allows you to send customers who decline to your “Thank you” page.
- Image Source allows you to add additional images to your page.
- Discount allows you to provide a special discount (not found in your shop) for your upsell/downsell.
- Video allows you to add a product review or any other type of video on your page.
- Product Shipping Cost allows you to change the shipping costs, if needed.
- Enable Ability To Upsell Product Already in Shopping Cart is pretty self-explanatory.
- Priority allows you to choose one product over another if it has the same price and is found within the same Upsell tag.
- Variants To Use For OCU Offers, if applicable.
When you’re satisfied with your settings, you can “Preview” the page or choose “Update” to put it into action right away.
Payments for Upsell Products
Zipify OneClickUpsell does not provide payment through your regular processing system in Shopify.
To receive your payments, go to Payment Processor in the Zipify app. Here you’ll be able to configure how to receive payments.
You can choose between Stripe and Paypal Express.

Whenever a customer purchases a product, it will create a transaction in your Stripe or Paypal account. All purchases will create separate transactions. This means when multiple upsells are purchased, you’ll see respective transactions individually.
The transaction IDs in your Stripe or Paypal account will be documented in your Shopify orders for reference.
Zipify OneClickUpsell Preferences
To activate the upsell and downsells funnels on your Shopify store, navigate to Preferences.
At the top, a notification states that your application is disabled and not displaying your upsells:

To turn this on, click Edit >> Application Status >> ON.

After you have turned on the Zipify application, scroll to the bottom and click Save. If you have linked your Payment Processor, the app should be ready to go.
Other Preference Settings
Inside the General section, you can
- Change your checkout URL
- Adjust your default country
- Add your Facebook Pixel ID for analytics and remarketing
- Include shopping cart total
- Insert other scripts and content
- Add your Google Analytics tracking ID
- Turn on autoplay for all videos
- Choose the amount of Upsell items in your funnel (1, 2, or 3)
- Forbid or allow the same product in cart to be an upsell
- Turn downsells on or off
- Choose the order of downsells (Low Price First, Random Item, or High Price First)
- Mark offer items in Shopify order
- Pass shopper ID to Shopify order
- Pass checkout token to Shopify order
In the Checkout section, you can:
- Change checkout background and order summary background
- Turn the ability to expand order summary on mobile on or off
- Create a custom footer
- Add a right-hand side panel
- Include shipping information
- Change form options (i.e. name, company name, address, etc.)
- Alter the order flow by skipping cart page (does not apply to subscriptions or bundles)
- Decide if and how collection of emails will be required
In the Offer Page section, you can:
- Adjust the general page settings (i.e. tagline, page title, page color, subtitle, order now text, product price “was” text, etc.)
- Change the product name to be above description
- Show how much a customer saves
- Button colors
- Shipping preferences (i.e. free shipping requirements, buttons, etc.)
In the Thank You Page section, you can:
- Adjust the thank you page tagline and subtitle
- Add a video
- Turn autoplay on or off
- Create an order confirmation button
- Add continue shopping links
- Provide special offers
In the 3rd Party Apps Support, you can activate the following apps:
- Product Customizer Basic by ShopStorm
- Quantity Breaks by Bold
- Customer Pricing by Bold
- Product Option by Bold
- Buy X Get One by Supple
- Fulfillment by Amazon
- Profit Pal by Money Maker Apps
- Trackify by REDretarget
- Pixel Perfect by Celtic Commerce
- Infinite Options by Shop Pad
- Recharge
- Wicked Reports
- Refersion
In the CRMs section, you can activate the following apps:
- Active Campaign
- Aweber
- Get Response
- InfusionSoft
- Klaviyo
- MailChimp
- Ontraport
In the Abandoned Cart section, you can turn it on and connect relevant CRMs.
Summary of Zipify OneClickUpsell
Setting up Zipify OneClicksUpsells may take a bit of time and learning, however the potential to increase profits is substantial and can be well worth the subscription costs, depending on how much traffic your store receives. Here’s a summary of the benefits and potential drawbacks you may expect if you decide to use Zipify for your store:
Benefits |
Drawbacks |
|
|
This review covers the basics for getting started on Zipify and setting up some upsells. Although you have to make a payment to give OneClickUpsell a try, when you discover a few winning upsell funnels, you won’t be wanting your money back.
Overall, Zipify OneClickUpsell represents a powerful tool for Shopify store owners to increase their profits post-purchase. If you haven’t been tapping into the full potential of what your customers may be willing to buy, provided they’re being asked at the right time and with relevant offers, it’s time to start upselling!


