Zipify Pages Hands-On Review (2020)
If you own a Shopify store or plan to launch one, there’s an exciting way to create high-converting landing pages that can also upsell your inventory with a single click. Introducing Zipify Pages.
Zipify Pages is a powerful drag-and-drop solution that integrates with your Shopify store allowing you to create completely custom pages and sell featured items with ease.
You can get started with a free trial account and test the most profitable pages used by proven, 8-figure eCommerce stores.
What is Zipify Pages
Zipify Pages was launched in 2016 as an add-on for Shopify stores. It was developed by Ezra Firestone who is a real expert in the fast-changing world of online eCommerce optimization. The insights Ezra has gained from his own eCommerce experience have been condensed into this app to help store owners succeed.
For anyone dreaming of starting a successful online store, Zipify Pages can help you get there faster and easier. Instead of relying on web developers, the drag-and-drop feature of Zipify Pages allows anyone to create a professional design without ever having to code.
Are you ready to get started with Zipify Pages?
Features of Zipify Pages
What makes Zipify Pages stand apart from other landing page apps for Shopify store owners is its integration.
You won’t need subdomains (i.e. subdomain.yourstore.com) to get your landing pages hosted live. Instead, Zipify Pages allows you to publish custom styles that look exactly like your store.
Here are a few more features included with Zipify Pages:
- Template pages from proven, 8-figure eCommerce stores
- Replicate sales funnels with ease
- Integrates with Google Analytics and Facebook Pixel
- All pages are hosted with your Shopify store
- Completely customizable pages
- Includes countdown timers, Videos, and 1-Click Pop Up Boxes
Setting Up A Shopify Store
Zipify Pages is only available to Shopify store owners. If you already have a Shopify store, you can skip this section and go straight to Getting Started With Zipify Pages.
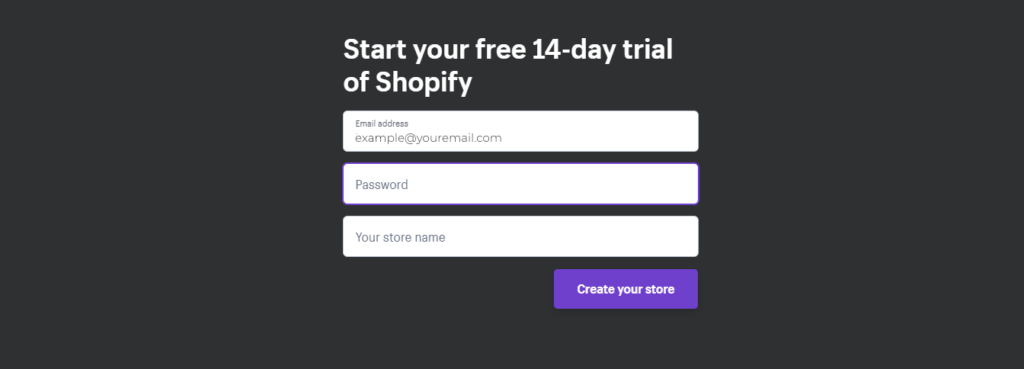
If you’ve never used Shopify before, you can get started with a 14-day free trial. All you need is an email address to sign up and you don’t have to use your credit card.
 As you setup your new Shopify account, be sure you know the name of your store and that its available to use.
After submitting your information, you’ll receive a confirmation email requesting you to complete the registration for your new Shopify account.
You’ll have to submit a few more details about yourself and how you want to be paid. Once that’s done, you’re now ready to start building your online store and creating custom landing pages for your products.
Getting Started With Zipify Pages
To get started with Zipify Pages, just go to Zipify.com, select the plan that best suits your needs, follow the simple instructions and enjoy their strong 30-Day 100% Money Back Guarantee.
You can alternatively log into your Shopify store, and once in your Shopify dashboard, go to (1) Apps >> (2) Visit Shopify App Store:

In the Shopify App Store, search “Zipify” and select the first option in the top left:

On the Zipify App page, click “Get” to install Zipify Pages on your Shopify store. You won’t have to pay $67 because you can start with a 14-day free trial.

After clicking “Get”, you’ll see a notification to install Zipify Pages in your Shopify dashboard. If you haven’t already entered your credit card information, you’ll be prompted to do so before being able to fully install Zipify Pages:

On the next page, you’ll be asked to approve charges.

Finally, you’ll be redirected to Zipify.com to review their terms and conditions before completing the installation process.

Remember, after submitting your credit card information, you’ll be covered by Zipify’s 100% No-Risk Promise:

Now, let’s look at how to create custom landing pages with Zipify!
Creating Your First Landing Page With Zipify
With Zipify Pages connected to your Shopify account, you’re ready to start designing custom landing pages for your store.
In the Zipify dashboard, go to Pages >> Create Page.

On the next page, you’ll have access to templates or the option to create your own custom page.

Before setting up a new page, let’s look at the types of landing pages provided by Zipify.
Types of Zipify Pages
There are 4 styles of landing pages provided by Zipify. Each have their own purpose and effect when combined with the overall goal of your Shopify store.

Here are the types of Zipify Pages you can create and when you can use them:
- Sales Pages. These are standalone pages which are perfect for featuring a single item from your store to increase its sales. Use these pages with a strong Call To Action (i.e. Buy Now) to convert the most visitors into new customers.
- When to use it? Sales pages are most effective with products on sale, new items, seasonal items, and promotional items. Alternatively, you can use this to highlight a bestseller in your store to drive sales even more.
- When to use it? Sales pages are most effective with products on sale, new items, seasonal items, and promotional items. Alternatively, you can use this to highlight a bestseller in your store to drive sales even more.
- Landing Pages. These are specific pages used in your marketing strategy to offer additional information or promotional materials for your store. Use these pages to collect leads and nurture your target audience to become future customers.
- When to use it? If you’re providing a discount coupon, you can use landing pages to provide your coupons in exchange for an email. Additionally, you can use landing pages to send anyone who opens up your email to obtain a free download, seminar sign up, product discount, and more.
- When to use it? If you’re providing a discount coupon, you can use landing pages to provide your coupons in exchange for an email. Additionally, you can use landing pages to send anyone who opens up your email to obtain a free download, seminar sign up, product discount, and more.
- Pre-Sell Articles. These are pages that provide visitors more information about a product before they make a purchase. Here you can include the benefits, features, and any other relevant information customers may need before being convinced to buy.
- When to use it? If you have a new product that requires customers to be educated, these are the perfect pages to create. Alternatively, you can use these pages to give an in-depth look at a product with previous customer testimonials and stories of your products in use.
- Booster Page. These are a two-page process requiring an email opt-in and a thank you delivery page. This feature is only available in the Plus Plan.
- When to use it? If you are using a CRM system, you can integrate your Zipify account and receive live updates whenever someone claims your coupon. Then, you can send those who opt-in through your sales funnel or a thank you page with featured products.
Using Zipify Page Templates
Once you know which type of Zipify pages you want to use, you can choose one of the templates and start building your landing page.
Let’s take a look at creating a sales page using the “New Product Announcement Sales Page” template.
First, click on “Use Template” then give your new landing page a name. You can add tags to help you identify and segment your pages in your dashboard.

After clicking “Create”, you’ll be taken to the drag-and-drop builder where you can begin to modify the template.

Each section, such as the Header, Counter, Shop Buttons, and Footer, can be rearranged and modified by hovering over the top left of the dashboard.

If you don’t want to use the Header and Footer design in the template, you can choose to show the native style from your Shopify theme.
To activate your Shopify theme’s Header and Footer go to SETTINGS >> Layout >> Use theme header/footer >> YES >> SAVE.

After activating your native theme’s header and footer, you can click on the trash can to delete the template’s header and footer. When your landing page goes live, your native theme will be displayed.

Changing any of the elements on the Zipify Pages template is quite easy. All you have to do is scroll over the items in each section and click on the small pencil in the top right corners.

Changing Text Boxes:

Changing Images:

Note: Be sure to add ALT Text to your image — this helps search engines understand your pages better.
When you are satisfied with the changes made to the Zipify Pages template, you can hit “Publish” and your page will go live.
Creating Custom Zipify Pages
If you don’t want to use the proven 8-figure templates provided by Zipify Pages, you have the full freedom to design your own.
The drag-and-drop builder allows you to design any kind of page you can think imagine.
Since you will not be editing a pre-made template, you can browse through all the different sections you can add to your page. Here are all the different sections you can use for your custom page design.
Headers should be placed at the top of your Zipify page as it includes access to other pages to your Shopify store. If you want to ensure visitors browse the product on the page, add clear CTAs throughout the page instead.

You can choose from the following types of Headers:
- Centered Logo (no navigation)
- Header + Navigation + Shopping Cart
- Header + Navigation + Shopping Cart (different style)
- Logo + Headline
- Logo + Navigation
- Navigation + Opt-In
- Opt-In Header
- Opt-In Header + Navigation (#1)
- Opt-In Header + Navigation (#2)
- Search Bar + Cart + Login
- Search Bar Header
- Simple Text Navigation (#1)
- Simple Text Navigation (#2)
- Top Bar Search + Cart
- Top Bar Search + Login
Opt-In Header:

Buy Boxes allow you to add products from your Shopify store. You can use this to compare prices between high value and low value products or showcase the best deal when buying in bulk.

You can choose from the following types of Buy Boxes:
- 2 Products + Buy Now
- 3 Products + Buy Now
- Best Value Offer
- Best Value Offer 2
- Best Value Offer 3
- Offer Box 2
- Product Listing 1
- Product Listing 3
- Recharge Subscription
Best Value Offer:

Timers allow you to limit your sales period and emphasize scarcity.

You can choose from the following types of Timers:
- Holiday “Order By” Timer
- Image + Title + Button
- Special Offer Timer
- Timer
- Title + Timer
- Title + Timer + Button
Holiday “Order By” Timer:

Dividers can be used to separate sections or highlight special areas.

You can choose from the following types of Dividers:
- Divider
- Headline + Divider
Headline + Divider:

Plugins provide you with additional features such as adding a comment section or review sections to your page.

You can choose from the following types of Plugins:
- Disqus Comments
- Facebook Comments
- Shopify Reviews
- YOT PO. Reviews
Disqus Comments:

Video can be added to feature your products or tell a story to connect with your audience.

You can choose from the following types of Video Sections:
- 2 Videos
- 3 Videos
- Image + Video + Button
- Video
- Video + Text
- Video + Text + Button
Video + Text:

Images allow you to show off your products either on its own, with additional text or a BUY NOW button.

You can choose from the following types of Image Sections:
- 3 Images
- 3 Images + Text
- 3 Images + Text + Button
- Brands / Icons Section
- Image
- Image + 3 Column Section
- Image + Paragraph Text
- Image + Text
- Image + Text + Button 1
- Image + Text + Button 2
- Image + Text + Button
- Image + Text – Left
- Product Listings 2
- Services / 4 Products + Text
- Small Image + Text
- Testimonial + Image 1
- Testimonial + Image 2
- Text + Button + Image
- Text + Image
- Text + Image 2 Rows
- Text + Image 3 Columns
- Text + Image – Right
- Text + Small Image
3 Images + Text + Button:

CTAs (i.e. Call To Actions) is a fundamental section that allows you to turn visitors into customers. You can use CTAs to send visitors to the check out or access a free download in exchange for their email opt-in.

You can choose from the following types of CTAs:
- 3 Images + Text + Button
- Image + Text + Button 1
- Image + Text + Button 2
- Product Listings 2
- Text + Button + Image
- Button
- Headline + Button
- Image + Video + Button
- Link
- On Page Opt-In Form
- Social Network Icons
- Video + Text + Button
Product Listings 2:

General Content provides you with sections to add any relevant information to your products, services, or promotions.
You can choose from the following types of General Content Sections:
- Headline + Button
- Headline / Line of Text
- Image + 3 Column Text
- Image + Paragraph Text
- Image + Text
- Image + Text + Image
- Image + Text – Left
- Plain Text #1
- Plain Text 2 Column
- Plain Text 3 Column
- Small Image + Text
- Testimonial + Image 1
- Testimonial + Image 2
- Testimonials
- Text + Image
- Text + Image 2 Rows
- Text + Image – Right
- Text + Small Image
- Video + Text
Footers can be used to add your copyright, terms and conditions, privacy policy, links to your shop, and much more.

You can choose from the following types of Footers:
- Brands + © Copyright
- © Copyright
- Full Footer
- Full Footer + Logo
- Links + © Copyright
- Logo + © Copyright
- Logo + © + Social Footer
- Logo + Social + © Stacked
Logo + Social + © Stacked:

Finally, Existing Blocks allow you to add any saved customized sections into the landing page you are developing:

Zipify Pages Pricing
After your trial is over, you’ll be automatically billed based on your subscription. Here are the prices for both Zipify Pages’ Basic and Plus subscription:
Monthly Subscription:
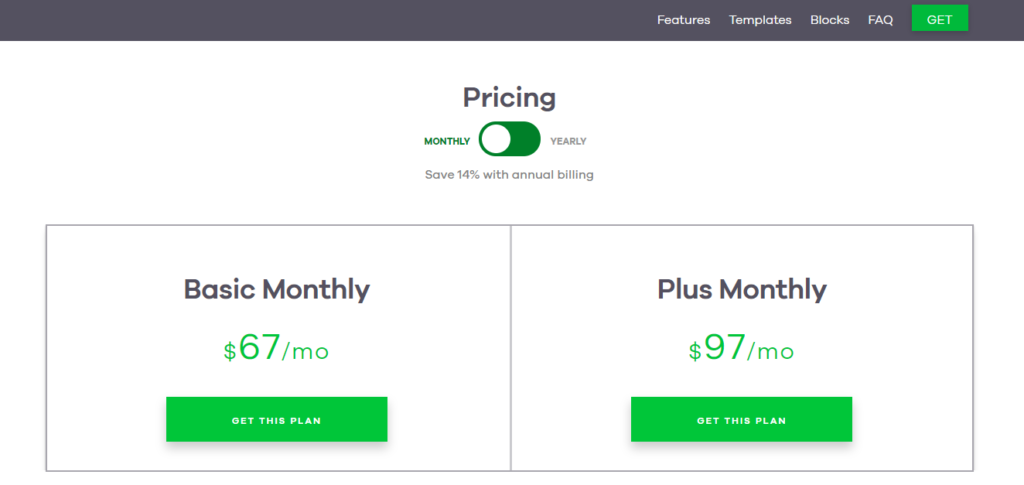
Yearly Subscription (Save 14%):
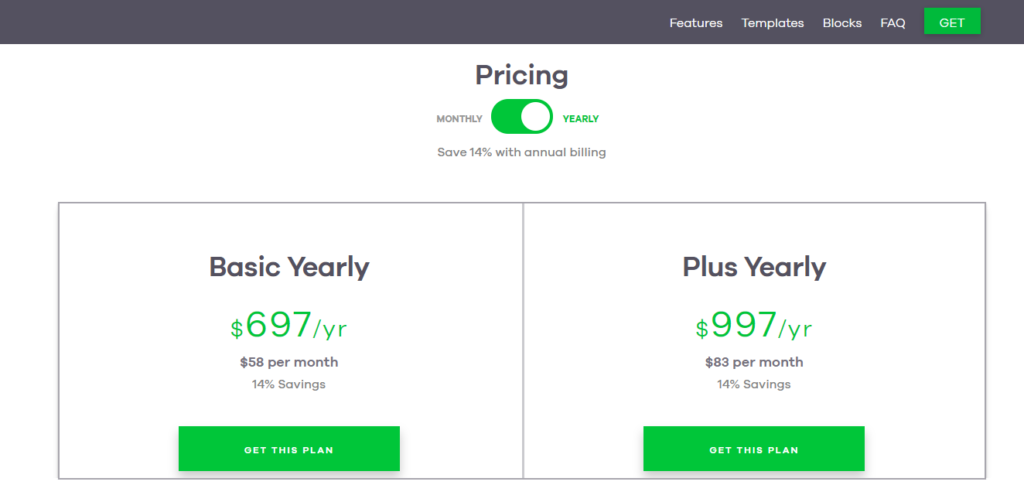
With both subscriptions, you get:
- Dashboard with Full Reports
- Proven Profit-driven Templates
- 2 Monthly Live Sessions
- Live Chat & Email Support
- Customizable Scarcity Timers
- Unlimited Pages
- 1-Click Light Boxes
- Shopify Dynamic Product Connections
- Custom Mobile Only Pages
- Ability to Use Your Shopify Theme’s Header / Footer
- Zipify Home Page
With the Plus plan, you’ll also have access to:
- Booster Pages
- Split Testing
- Shopify Blog Integration
Depending on your ecommerce goals, the Basic plan offers enough tools to start selling your featured products and test results using your own analytic tools.
It is possible to upgrade to a plus plan at anytime and if you choose to do so, your account will be prorated in the next billing cycle.
Drawbacks of Zipify Pages
Typically, when you are provided a free trial for a service, you have access to all the features available. With a 14-day free Zipify Pages trial, you only have access to their Basic Plan. Some landing page templates, blog pages, and split tests are only available in the Plus Plan. This is why we recommend signing-up directly on Zipify’s website instead of through Shopify’s App Store. This will give you access to all the features of the Plus Plan so you can check if you need them, without risk thanks to the generous 30-Day Money Back Guarantee.
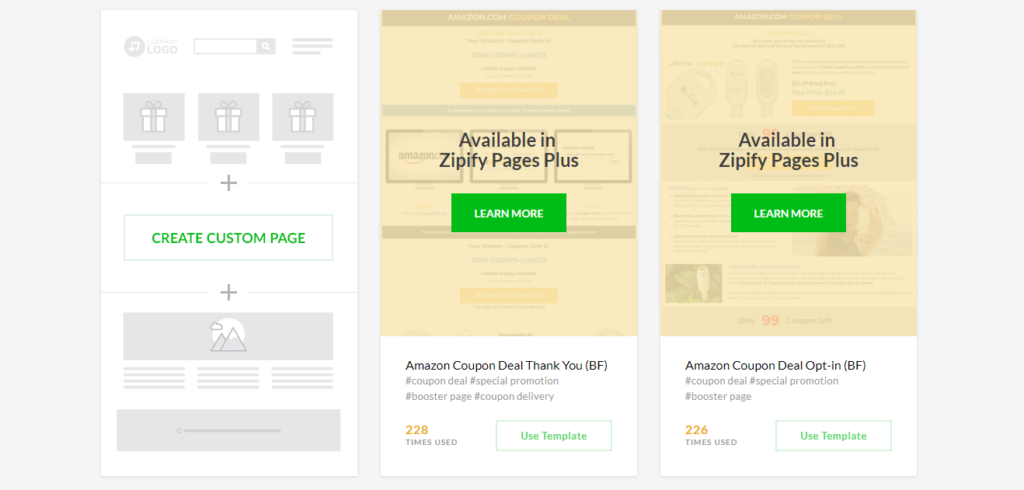
At the moment, there are only 16 landing page templates available in the Basic Plan.
Also, when you browse the templates, you only get to see how many times the template was used and a few related keywords. It would be nice to see links to case studies or examples as to how these templates have worked (i.e. for 8-figure eCommerce sites).
Final Thoughts on Zipify Pages
There are not many drawbacks to using Zipify Pages because it does provide complete customization without having to hire expensive web developers.
Zipify Pages offers a very easy drag-and-drop page builder and that can be customized with a few single clicks. Perhaps what makes Zipify Pages most exciting is the templates based on what has worked for successful 8-figure eCommerce stores. Copying the style and approach while adding the right alterations to fit your own audience could yield incredible returns.
Overall, we believe Zipify Pages can be of a tremendous help to Shopify store owners, both to boost their sales and improve the user experience. And, since anyone can start with a 14-day free trial or a straightforward 30-Day Money Back Guarantee, there’s nothing to lose and only profits to be made! Just make sure you cancel your subscription if you are not happy with the results.


